Shiny Modules
Tidiness is half the life .. this is a German saying that you might not necessarily have to live. While it becomes essential in programming, at least in my opinion. Because when you do not invest a little time into the order and structure of your projects, the time you spend debugging will multiply.
If you developed a shiny app before, you had to think about the user interface (UI) and the server side. The code to create the UI probably landed in the file ui.R, the server function in a server.R file (or you combined both of them in app.R). As soon as the app gets a bit more complex, the two files get bigger and quickly confusing. Typically, you then begin to outsource individual blocks or functions to additional files in order not to lose the overview in ui.R and server.R. These files also continue to grow, become confusing and often cause errors, which take an enormous amount of time and nerves, although this would be easy to avoid.
As in our blog article on using modules in R explained, modules represent a level of abstraction between functions and packages. They are virtual storage boxes in our packages, which make it enormously easier for us to establish a structure in projects and to keep order.
In this article we look at how to build a shiny app with clear code, reusable and automatically tested modules. For that, we first go into the package structure and testing a shiny app before we focus on the actual modules.
Package Structure
Even if you program only small applications, it makes sense to wrap them up in a package. This will give you a versioned edition of the app and lets you easily jump back to previous versions, if in a new version something is not working as it should. It also makes it possible to keep logic out of the app and put it in the package along with automated tests instead.
You can create the package structure either manually or use the function package.skeleton().
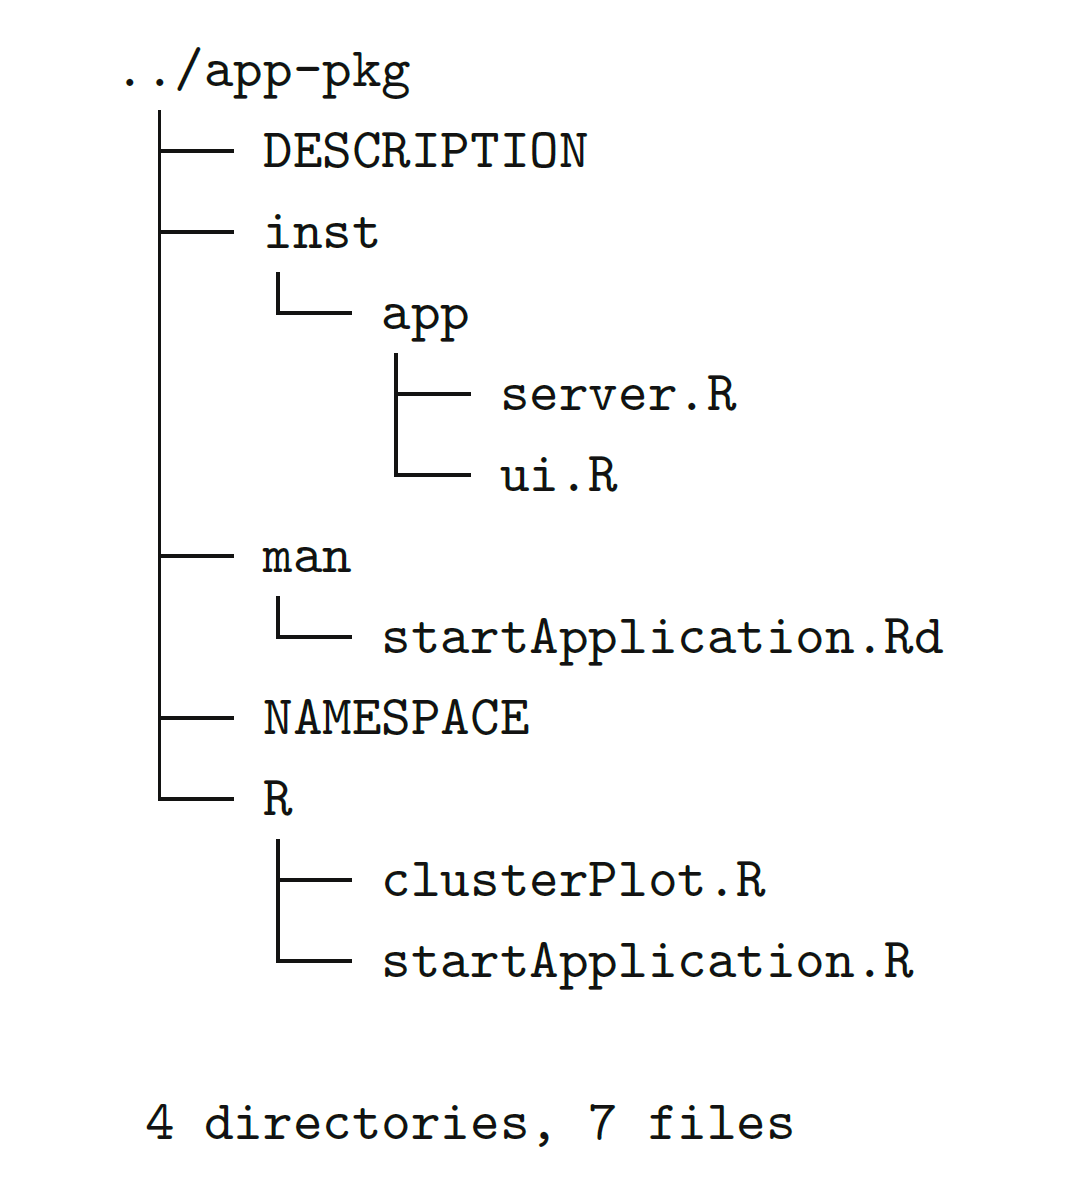
We pack the app in a folder of any name (for example app) in the inst folder. To start the app, we put another function called startApplication() in the R folder:
#' Start Application
#'
#' @param port port of web application
#'
#' @export
startApplication <- function(port = 4242, appFolder = "app") {
  runApp(
    system.file(appFolder, package = "myPackageName"),
    port = port,
    host = "0.0.0.0"
  )
}
The package structure then looks something like this.
And the typical workflow might be something like this:
devtools::install()    # neue Version des Pakets installieren
library(myPackageName) # Paket laden
startApplication()     # App starten
Server Function Without Logic
Implementing automated tests in shiny apps is not trivial, because you have to simulate the interaction of many UI building blocks and server components. However, the package shinytest provides a convenient framework for testing. Most of the time, you can also make sure to write a robust app by meeting some precautions in your app code without having to use shinytest.
For this it is necessary that the server.R file contains as little logic as possible. For this you should put R functions into the new package structure, which can then be tested as part of R CMD check. Ideally, every reactive function in shiny consists of only one line of code. These reactive functions include either other input elements, reactive values, other reactive functions or simply function calls:
data <- observeEvent(input$button, getData())

model <- reactive(runModel(data(), param1, param2)

results <- reactive(extractResults(model())

output$text <- renderText(prepareResults(results()))
Modules
It is possible to combine larger components of an app in one module. This has several advantages:
- A module has one specific task
- Own namespace
- Defined interface with module
- Reusability (in- and outside of the project)
For example, at http://inwtlab.shinyapps.io/exportPlotModule you will find a module that allows the export of plots from a shiny application.
As for a shiny app itself, we need to implement both the UI and the server function for a module. Let’s start with the UI. We need a function that creates UI elements for the module. The name of the function is arbitrary, but it makes sense to start with the module name.
plotExportUI <- function(id) {
  ns <- NS(id)

  tagList(
    selectInput(ns("type"), label = "Type", choices = c("png", "pdf", "tiff", "svg")),
    plotOutput(ns("preview")),
    downloadButton(ns("download"), "Download")
  )
}
The code ns creates the namespace function ns, which converts any id of a UI element into an id in the namespace of the module. Otherwise, only different UI elements are defined in the function and returned via tagList.
The server function looks like this. Again, the name is arbitrary, but again it makes sense to start with the module name.
plotExport <- function(input, output, session, plotObj) {
  output$preview <- renderPlot({
    plotObj()
  })

  output$download <- downloadHandler(
     filename = function(){
       paste0("plot.", input$type)
    },
    content = function(file){
      switch(
        input$type,
        png = png(file),
        pdf = pdf(file),
        tiff = tiff(file),
        svg = svg(file)
      )
      print(plotObj())
      dev.off()
    }
  )
}
The function looks like a normal server function with an additional parameter plotObj. This contains the plot object as a reactive element.
Now let’s look at how the module is called. Unsurprisingly, this happens in two places. In the ui.R the module is called like a normal UI element:
[...]
plotExportUI(id = "export")
[...]
The id parameter defines the namespace of the module. It is also possible to use the module several times in one app - just be sure to use another id.
In the server.R the module has to be started as well:
[...]
  plot <- reactive({
    [...]
    ggplot(d, aes_string(x = input$xcol, y = input$ycol, col = "clusters")) +
      geom_point(size = 4)
  })

  callModule(plotExport, "export", plot)
[...]
plotExport is the name of the server function of the module, "export" is the same id as for the UI element of the module. In addition, one passes the reactive element plot. One could also use fixed parameters at this point. However, if you want to pass a reactive element, you have to pay attention to input variables. For example, to pass the variable input$abc, you would need to call callModule like this:
callModule([...], param = reactive(input$abc))
So you have to include the variable in reactive to make sure it’s passed as a reactive variable. The same applies to reactive values that have been generated with reactiveValues.
The UI and the server function of the module can be easily stored in a R package to make it available to others.