Continuous Integration: Introduction to Jenkins
In our first blog article on Continuous Integration, we presented a selection of CI tools - including the very widespread and long-standing tool Jenkins. Jenkins is a web-based, free, open source continuous integration system written in Java. The configuration, visualization, and evaluation of projects takes place exclusively via the browser. A specialty of Jenkins is its high flexibility: with over 1500 plugins currently available, configurations can be individually designed. The basic requirement for continuous integration is that the code is managed in a version control system. Here, too, Jenkins offers a large selection of compatible version control systems.
Incidentally, the name Jenkins originated from the developers' assumption that the name is associated with the profession of a butler. This article is intended to give an introduction to the tool and to provide suggestions on how you can use the butler with the red bow tie for yourself and your projects.
Installation
Jenkins is available in different versions. First of all, you can choose between a long-term support version (LTS) and a weekly version. While Jenkins releases an update every week for the Weekly version, a stable version is released for the LTS version every three months. The decision should be based on your individual preferences and needs. In the next step you can choose between different releases: in addition to installation packages for the common operating systems (Windows, Ubuntu / Debian, MacOS), a version for Docker and a web archive (.war) are also available.
You can download the right installation package for you here: https://jenkins.io/download/. Under Debian-based distributions in Linux you can install Jenkins via `apt`. Through the installation, Jenkins is launched as a daemon when the system is started up and a Jenkins user is created. On Windows, all you have to do is open the downloaded package and follow the installation instructions. Jenkins then listens on port 8080, which you can access via your browser at http://localhost:8080/ to begin the configuration.

Here you can see the homepage of Jenkins. In the menu bar on the left you have e.g. the possibility to create a new job, make configurations, or to look at the build history. Below you can see the build queue and the build processor status. On the right you will find an overview of all existing jobs with the respective information on the last success, failure and duration. We will clarify exactly what all these terms mean in the next sections.
Get started with Jenkins: Create and Configure Jobs
The first step in building a software project with Jenkins is to create a so-called “job” in Jenkins. This can take on various tasks. There are usually several jobs within a software project. For example, jobs are common to run unit tests or deploy code. There are basically two ways to create a job:
- You configure the job entirely via the click interface in Jenkins
- You create a Jenkinsfile in a version control system like GitHub, which you then integrate into Jenkins.
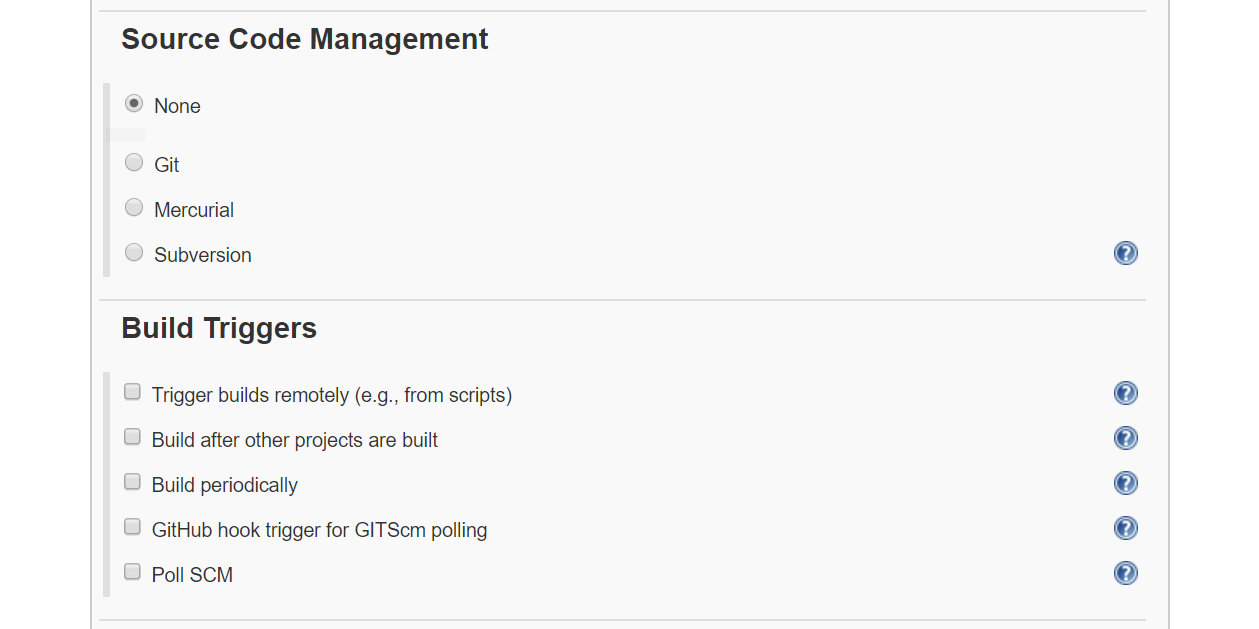
There are different types of jobs in Jenkins, which you can select by clicking on "New Item". The most common type is the freestyle project. You can completely configure a job using the click interface. As an illustration, we have configured a freestyle job that says “Hello World!”:

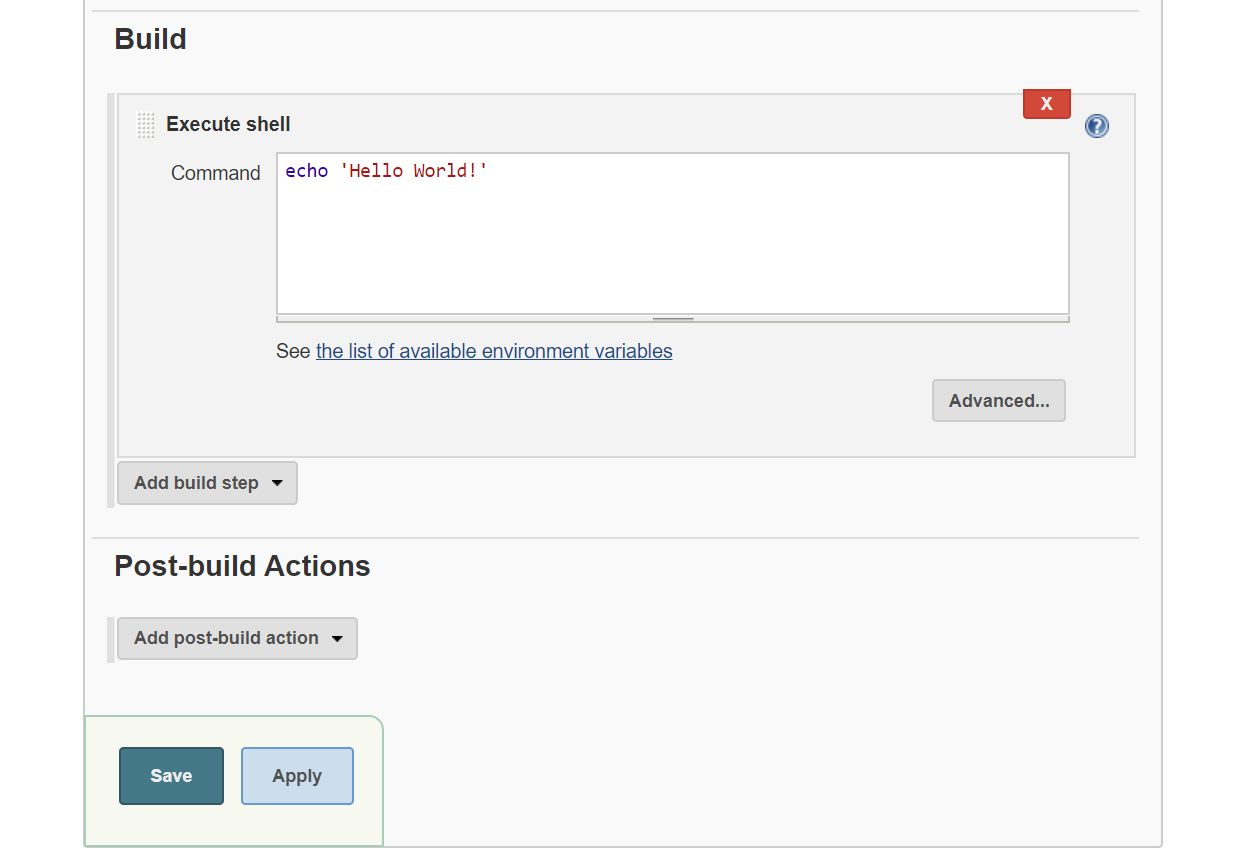
As you can see, you have a wide range of configuration options. For the sake of clarity, we only show some of the settings. At INWT we also use various plugins in Jenkins, which is why some of these options are not available in the basic installation.
As part of the configuration, it may make sense to choose a build trigger. You can, for example, start the job time-controlled (e.g. every day at a specific time) or execute it depending on other projects (e.g. after another job has been successfully executed). In our case, we didn't choose a build trigger.
Once you have made the configuration, the job can be carried out manually by clicking on “Build Now”. Running a job once is called a build. After the job has run through, it is colored in the build history: blue for a successful build, and red for a faulty build. You may also have heard of the characteristic weather markings (sun, clouds, thunderstorms) in Jenkins: it is an indicator of the general “health” of a job, and is influenced by factors such as the build history or the code coverage results.
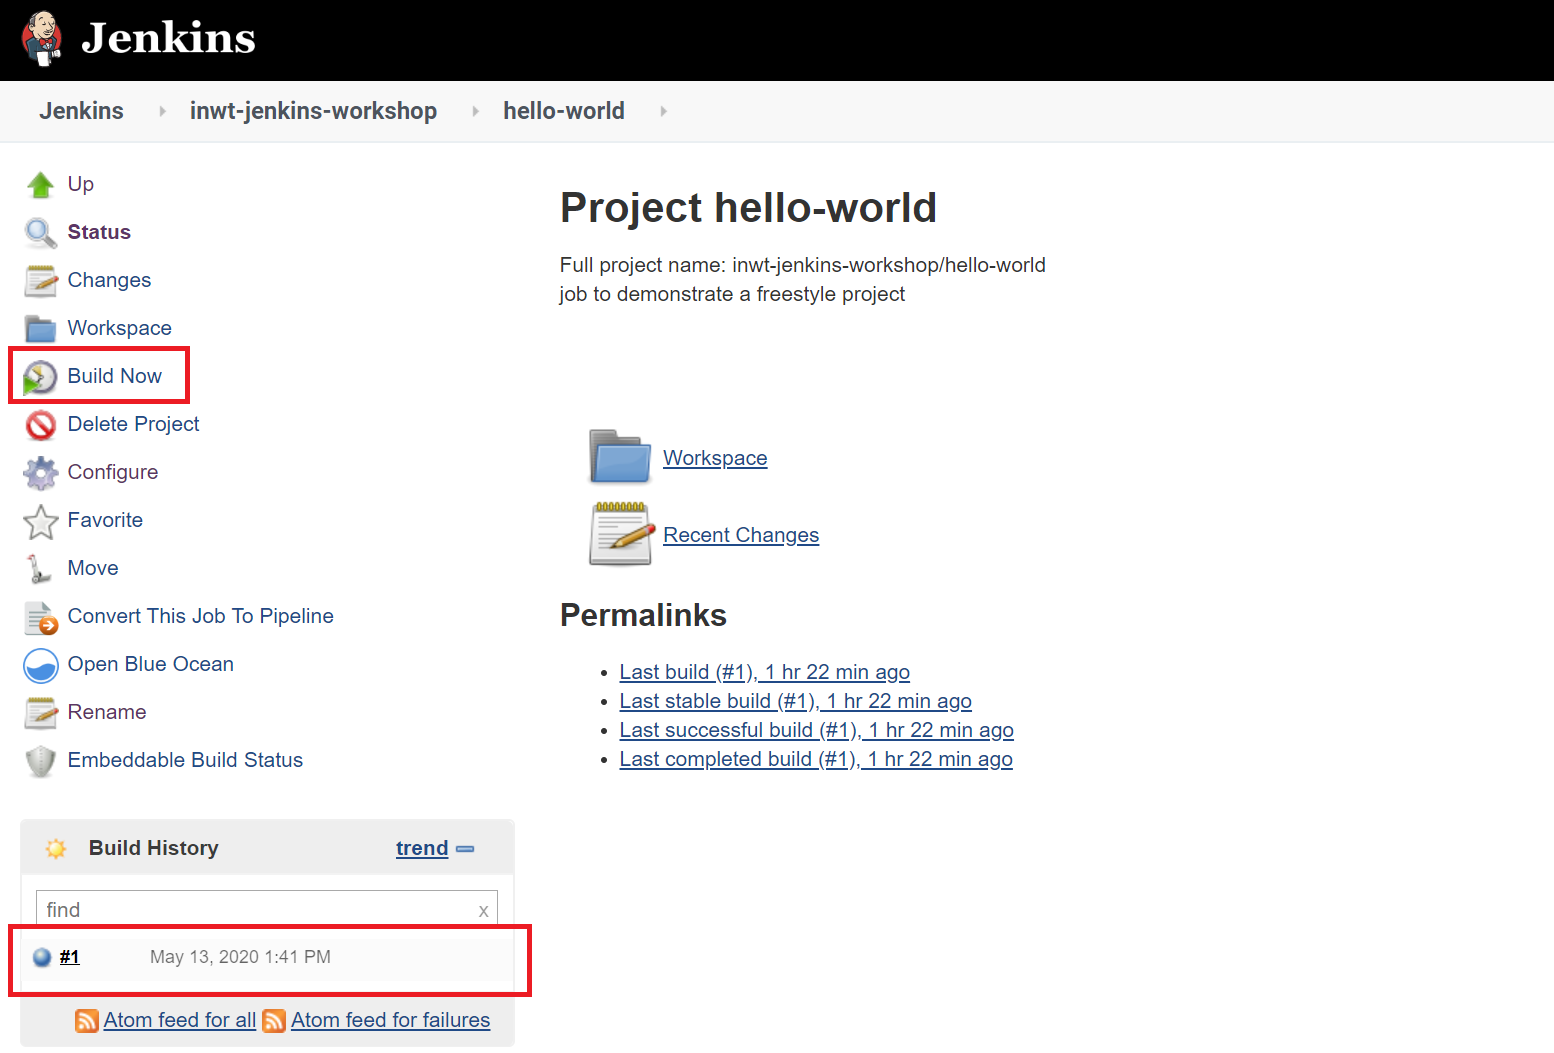
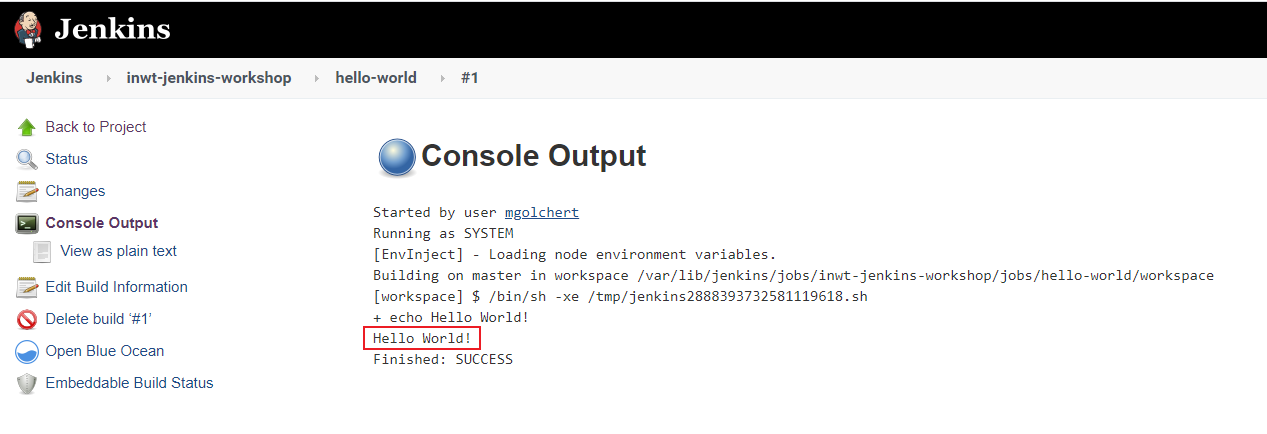
We can see from the blue dot that our build was successful. By clicking on the build and on the following page on “Console Output” we get to the console output and can see that the job printed “Hello World!”.
GitHub Integration in Jenkins
In Jenkins you have the option to embed a source code management system such as GitHub. In the case of GitHub, the Git plugin, the repository URL, and the corresponding credentials are required to access the code in the repository. In the simplest case, there is a Jenkins file in the repository that is executed when the job is started. When choosing the build trigger, you have the practical option of starting the job with each commit to a defined branch. This setting is particularly suitable for jobs that perform unit tests.
Creation of a Pipeline Jenkinsfile
A Jenkins pipeline is defined in a Jenkinsfile. Pipeline Jenkins files follow the Groovy syntax. An example Jenkins file with minimal setup, in which an R script is executed in a Docker container, could look like this:
pipeline {
    agent none
    stages {
        stage('Pull dockerimage') {
            steps {
                sh '''
                docker pull inwt-jenkins-image
                '''
            }
        }
        stage('Run rscript in container') {
            steps {
                sh '''
                docker run --rm --network host \
                  --name inwt-jenkins-container \
                  inwt-jenkins-image Rscript inwt-jenkins-rscript.R
                '''
            }
        }
    }
}
A pipeline contains different stages, with the commands to be executed being in the “steps” block. In the first stage in our example, the Dockerimage is pulled, while in the second stage the container is started and an R script is executed.
At INWT we prefer the possibility of integrating Jenkins files over the pure configuration of the jobs via the click environment. This increases the clarity for us, since the Jenkins files are in the same place as the code. In addition, they are immediately accessible to all team members and we can benefit from the version control tools such as pull requests with code reviews or rollbacks.
Conclusion
Due to the extensive application and configuration options of Jenkins, this article could also cover a variety of other topics at this point. Jenkins has established itself as an extremely helpful tool for the majority of our data science projects, especially when it comes to unit tests, ETL processes, and deployments. It enables us to automate manual tasks and to recognize faulty code at an early stage, so we can react immediately and thus ensure the quality of the code in the long term.